A Guide to The Venetian Plaster Process
- July 19, 2019
- 0
The mixing of marble dust with plaster on the surface of the ceiling or wall is known as Venetian plaster. Experts use trowel or spatula to apply Venetian

9621 Agnes Crossing, Lake Suzanneview, New Mexico Island 84604-9295.
The mixing of marble dust with plaster on the surface of the ceiling or wall is known as Venetian plaster. Experts use trowel or spatula to apply Venetian
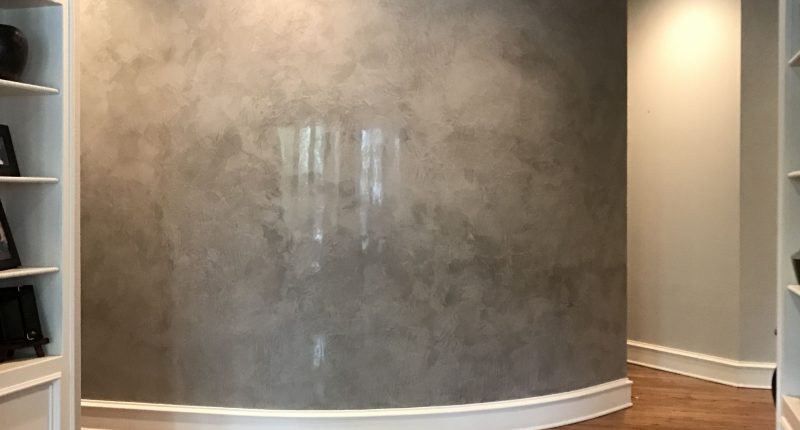
The mixing of marble dust with plaster on the surface of the ceiling or wall is known as Venetian plaster. Experts use trowel or spatula to apply Venetian plaster on the surfaces. If we learn more about this specific type of plaster, we’ll find that Venetian plaster gives the best results by applying in thin layers.
These layers are later burnished, which creates a smooth surface and gives an illusion of texture and depth. If we leave the Venetian plaster unburnished, it will provide a rough, matte finish.
The process:
We can use multiple techniques for applying Venetian plaster. However, before we learn further, we need to understand the tools and materials required for the process. Unlike other plastering jobs, in Venetian plastering, you won’t need to purchase a lot of tools. The basic items which you require are steel trowel, 400 to 600 grit sandpaper and Venetian plaster.
Thanks to many studies and experience of individuals, we learn that a better Venetian plastering depends upon the surface quality, condition of the room and type of job you are doing. So, in every scenario, you require additional tools as well. These tools are, but not limited to, gloves, eye goggles, drop cloth, primer, paintbrush, roller, roller cover, paint tray, colourants, and paste wax.
If we want to hire residential plaster service, we usually will be able to see the use of the above mentioned and tools personally. These days, plastering contractors want to bring an elegant finishing to their work and all of the tools that I have described add an extra flare to the finishing of the surface.
Next step – Plastering:
If you are expert in painting the walls and surfaces, it doesn’t necessarily mean that you will be right in plastering. Venetian paster requires a different set of experience and practice than painting. You need to spend a little time with the tools and materials to have confidence in Venetian plastering.
I would recommend that you should buy a few sheets of drywall and start applying Venetian plaster by using different strokes and angles.
Things to consider before process:
A thing to understand before applying Venetian plaster is that you should clear the room as much as you can. After you clear the room, spread drop cloth on the floor. Before applying the Venetian plaster, please make sure that the surface is smooth and has no cracks.
In case you have any crack in the wall or ceiling, fill the cracks first. Now, we need to ensure that the surface has no dirt. Now, you should cover the surface with flat paint.
I usually suggest that you should wear gloves while mixing plaster as it can give an irritating feel to your hand. If you are applying Venetian plaster on ceilings, wear goggles for eye protection as well.
After you have mixed all the ingredients, you should start from the corners of the room. Apply the first thin layer by using streel trowel at 15 to 30 degrees of angle. Now, spread the plaster by using strokes of different angles and variable lengths. You don’t have to worry about covering every inch of the wall. Only you need to ensure that the surface looks smooth.
As have finished the first layer, you need to get information about applying the second layer. We always apply the second layer by using the plaster of the same colour. A proper way to apply the second layer is by holding the trowel at 60 to 90 degrees of angle and use strokes in overlapping directions to cover the remaining space.
In the ending step, we will burnish the surface. For burnishing, we rub the surface by using sandpaper in a circular motion. At the concluding phase, clean the surface with a damp cloth to finish the process.